Package manager and systemctl
In this interactive blog post, we will explore the concepts of package managers and systemctl, and demonstrate how to install Docker and Jenkins.

What is a packer manager in Linux?
In simpler words, a package manager is a tool that allows users to install, remove, upgrade, configure and manage software packages on an operating system. The package manager can be a graphical application like a software center or a command line tool like apt-get or pacman.
What is a package?
Most software applications designed for Linux or Unix systems are distributed as packages, which are archives that contain the pre-compiled binary software files, installation scripts, configuration files, dependency requirements, and other details about the software. These packages are typically specific to a particular distribution and formatted in that distribution’s preferred package format, such as .deb for Debian/Ubuntu and .rpm for CentOS/RHEL.
While it’s relatively simple for a user to install a package file, there are other complexities to consider. These complexities include obtaining (downloading) the package, ensuring packages are upgraded with security and bug fixes, and maintaining all the dependencies for the software.
Different kinds and Commonly used package manager tools
There are lots of package managers in Linux, each working a bit differently. Here is a list of common package managers, along with their supported distributions, package file formats, and a description.
YUM
Using YUM to Manage Packages in CentOS/RHEL 7 and Earlier
Distributions: RHEL/CentOS 7, Fedora 21, and earlier versions of both distributions
Command:
yumUnderlying package management tool: RPM (RPM Package Manager)
Package file format:
.rpm
Yellowdog Updater, Modified, more commonly known as YUM, is a package management tool for a variety of older RHEL-based distributions (such as CentOS 7) and older versions of Fedora. It provides an easy-to-use interface on top of the low-level functions available in the RPM Package Manager (RPM). It has largely been replaced by its successor Dandified YUM, also called DNF, on most newer RPM-based distributions.
Pacman
Using Pacman to Manage Packages in Arch
Distributions: Arch-based, including Arch and Manjaro
Command:
pacmanPackage file format:
.tar.xz(and other compressed tar formats)
Arch Linux and other similar distributions (like the popular Manjaro desktop distro) use the pacman package manager. Packages are stored as compressed tarballs and, as such, are generally smaller than other package formats. Pacman is unique in that it comes with a system to build packages, not just manage them. This system is called the ABS (Arch Build System).
APT
Using APT to Manage Packages in Debian and Ubuntu
Distributions: Ubuntu, Debian, and Kali Linux
Commands:
apt,apt-get,apt-cacheUnderlying package management tool: dpkg
Package file format:
.deb
Advanced Package Tool, more commonly known as APT, is a package management system for Debian, Ubuntu, and other similar Linux distributions. It acts as a front-end to the lower-level dpkg package manager, which is used for installing, managing, and providing information on .deb packages. Most distributions that use APT also include a collection of command-line tools that can be used to interface with APT. These tools include apt-get, apt-cache, and the newer apt, which essentially combines both of the previous tools with some modified functionality.
Let's get your hand's on a Practical demonstration on Ubuntu
Install Docker and Jenkins in your Ubuntu Server system
My Ubuntu Server is created on Azure Portal
Connecting my Azure Ubuntu VM through SSH
Prerequisites
- Docker Engine needs the 64-bit version of Ubuntu!
Let's Start with Docker Installation on Ubuntu.
hemant@Ubuntu-VM:~$ sudo apt-get update
Hit:1 http://azure.archive.ubuntu.com/ubuntu jammy InRelease
Get:2 http://azure.archive.ubuntu.com/ubuntu jammy-updates InRelease [119 kB]
Get:3 http://azure.archive.ubuntu.com/ubuntu jammy-backports InRelease [108 kB]
Get:4 http://azure.archive.ubuntu.com/ubuntu jammy-security InRelease [110 kB]
Fetched 337 kB in 1s (497 kB/s)
Reading package lists... Done

This is the package name of the Docker software in the Ubuntu package repository. The package contains the necessary components to install and run Docker on the system.
hemant@Ubuntu-VM:/home$ sudo apt install docker.io
the package manager will download the Docker package from the Ubuntu repositories (if it's not already present), install it along with any necessary dependencies, and set up the Docker software on your Ubuntu system. After successful installation, you will be able to use Docker to manage containers and containerized applications.
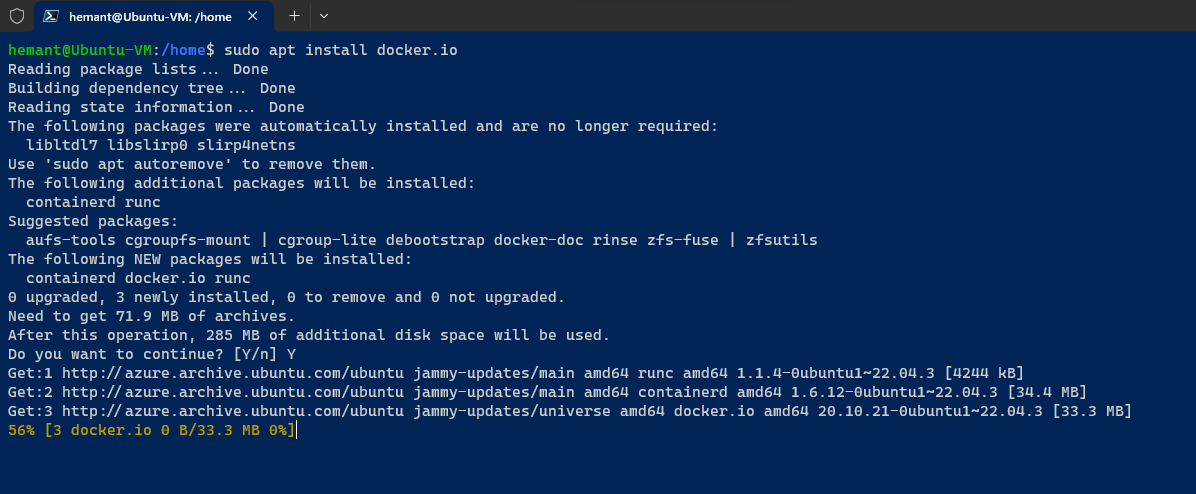
Once Docker is installed, you need to start and enable it to start automatically at boot. Run the following commands:
hemant@Ubuntu-VM:/home$ sudo systemctl start docker
hemant@Ubuntu-VM:/home$ sudo systemctl enable docker
If the installation is successful, you will see the installed Docker version displayed in the terminal.
hemant@Ubuntu-VM:/home$ docker --version
Docker version 20.10.21, build 20.10.21-0ubuntu1~22.04.3

hemant@Ubuntu-VM:/home$ sudo docker run hello-world
Unable to find image 'hello-world:latest' locally
latest: Pulling from library/hello-world
719385e32844: Pull complete
Digest: sha256:926fac19d22aa2d60f1a276b66a20eb765fbeea2db5dbdaafeb456ad8ce81598
Status: Downloaded newer image for hello-world:latest

Hello from Docker!
This message shows that your installation appears to be working correctly.
To generate this message, Docker took the following steps:
 1. The Docker client contacted the Docker daemon.
 2. The Docker daemon pulled the "hello-world" image from the Docker Hub.
    (amd64)
 3. The Docker daemon created a new container from that image which runs the
    executable that produces the output you are currently reading.
 4. The Docker daemon streamed that output to the Docker client, which sent it
    to your terminal.
To try something more ambitious, you can run an Ubuntu container with:
 $ docker run -it ubuntu bash
Share images, automate workflows, and more with a free Docker ID:
 https://hub.docker.com/
For more examples and ideas, visit:
 https://docs.docker.com/get-started/
The above command downloads a test image and runs it in a container. When the container runs, it prints a confirmation message and exits.
You have now successfully installed and started Docker Engine.
Installing Jenkins on Ubuntu Server
Jenkins is a powerful open-source automation server that facilitates continuous integration and continuous deployment (CI/CD) processes. It helps developers automate building, testing, and deploying software efficiently.
Using the same Ubuntu server which was used for Docker
Prerequisites
- Java
Let's Start with Jenkins Installation on Ubuntu.
Jenkins requires Java to run, so let's install the JDK. Run the following command:
hemant@Ubuntu-VM:/home$ sudo apt install openjdk-11-jdk
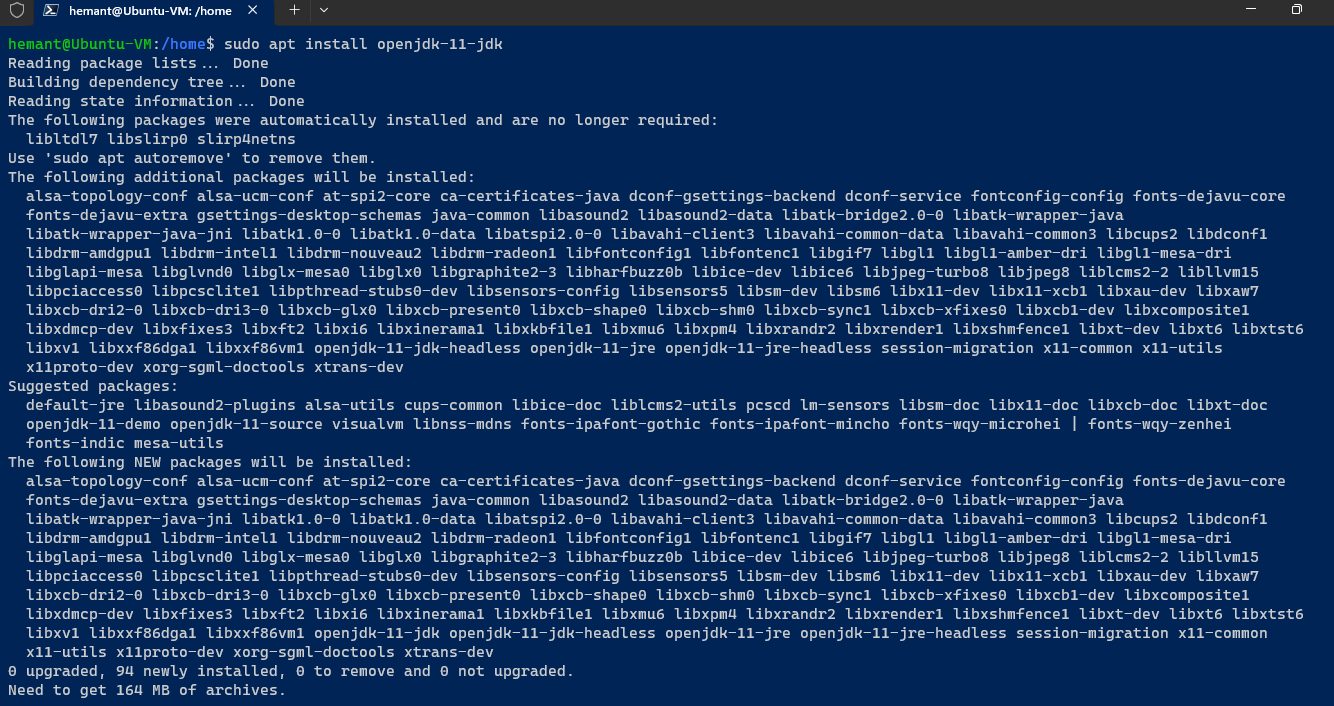
If the installation is successful, you will see the installed Java (JDK) version displayed in the terminal.
hemant@Ubuntu-VM:/home$ java --version
openjdk 11.0.19 2023-04-18
OpenJDK Runtime Environment (build 11.0.19+7-post-Ubuntu-0ubuntu122.04.1)
OpenJDK 64-Bit Server VM (build 11.0.19+7-post-Ubuntu-0ubuntu122.04.1, mixed mode, sharing)
Now, add the Jenkins repository key directly to the keyring:
hemant@Ubuntu-VM:~$ curl -fsSL https://pkg.jenkins.io/debian-stable/jenkins.io-2023.key | sudo tee \
  /usr/share/keyrings/jenkins-keyring.asc > /dev/null
Breakdown Command
Download the Jenkins repository key from the specified URL securely (
curl).-fsSL: These are options passed tocurl:-f: Fail silently and do not show progress bars.-s: Silent mode, suppresses error messages.-S: Show error messages if they occur.-L: Follow redirects if the server responds with a redirect.
Save the converted key in the keyring file (/usr/share/keyrings/jenkins-archive-keyring.gpg) used by APT to manage trusted GPG keys
The command is used to add the Jenkins repository to the APT sources list on an Ubuntu system. This allows the system to access and install packages from the Jenkins repository using the apt package manager.
echo deb [signed-by=/usr/share/keyrings/jenkins-keyring.asc] \
  https://pkg.jenkins.io/debian-stable binary/ | sudo tee \
  /etc/apt/sources.list.d/jenkins.list > /dev/null
Proceed with updating the package lists and installing Jenkins as before:
Both commands do the same thing
sudo apt-get update
sudo apt update
Install the Jenkins package and any necessary dependencies on the system.
After executing these commands, Jenkins will be installed on your Ubuntu system, and you can proceed with the setup and configuration as explained in the previous responses.
hemant@Ubuntu-VM:~$ sudo apt-get install jenkins
Reading package lists... Done
Building dependency tree... Done
Reading state information... Done
The following packages were automatically installed and are no longer required:
  libltdl7 libslirp0 slirp4netns
Use 'sudo apt autoremove' to remove them.
The following additional packages will be installed:
  net-tools
The following NEW packages will be installed:
  jenkins net-tools
0 upgraded, 2 newly installed, 0 to remove and 0 not upgraded.
Need to get 95.8 MB of archives.
After this operation, 99.3 MB of additional disk space will be used.
Do you want to continue? [Y/n] y
Get:1 http://azure.archive.ubuntu.com/ubuntu jammy/main amd64 net-tools amd64 1.60+git20181103.0eebece-1ubuntu5 [204 kB]
Get:2 https://pkg.jenkins.io/debian-stable binary/ jenkins 2.401.2 [95.6 MB]
Fetched 95.8 MB in 3s (30.2 MB/s)
Selecting previously unselected package net-tools.
(Reading database ... 63364 files and directories currently installed.)
Preparing to unpack .../net-tools_1.60+git20181103.0eebece-1ubuntu5_amd64.deb ...
Unpacking net-tools (1.60+git20181103.0eebece-1ubuntu5) ...
Selecting previously unselected package jenkins.
Preparing to unpack .../jenkins_2.401.2_all.deb ...
Unpacking jenkins (2.401.2) ...
Setting up net-tools (1.60+git20181103.0eebece-1ubuntu5) ...
Setting up jenkins (2.401.2) ...
Created symlink /etc/systemd/system/multi-user.target.wants/jenkins.service → /lib/systemd/system/jenkins.service.
Processing triggers for man-db (2.10.2-1) ...
Scanning processes...
Scanning linux images...
Running kernel seems to be up-to-date.
No services need to be restarted.
No containers need to be restarted.
No user sessions are running outdated binaries.
No VM guests are running outdated hypervisor (qemu) binaries on this host.
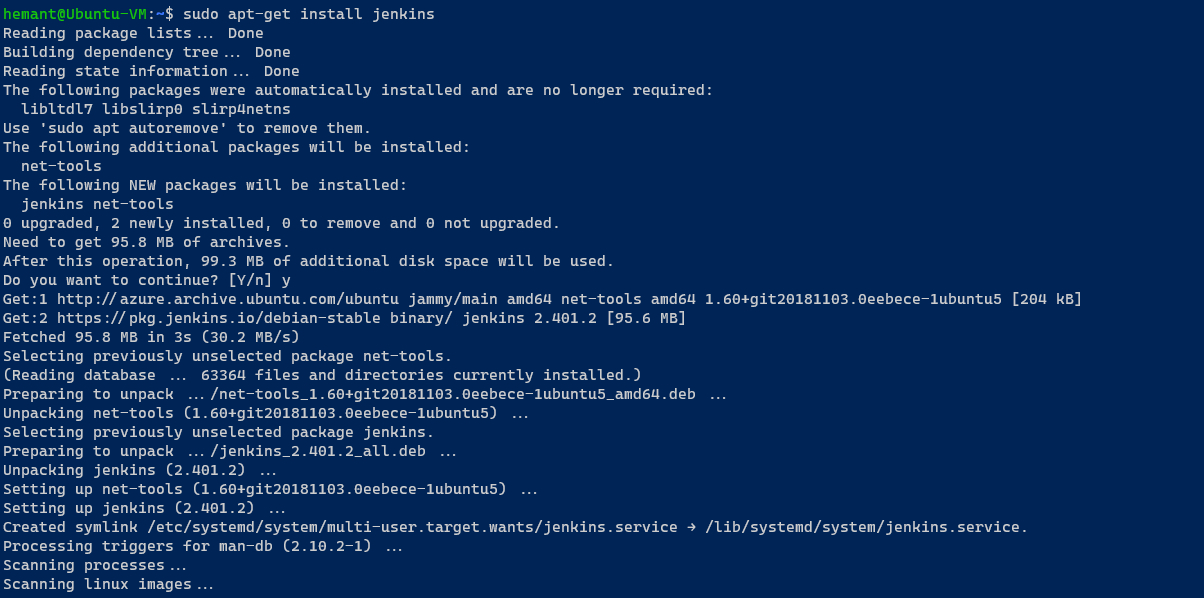
Jenkins installation is complete by default, Jenkins runs on port 8080.
Let us configure Linux internal firewall to allow traffic on the 8080 port from anywhere.
hemant@Ubuntu-VM:~$ sudo ufw allow 8080
Rules updated
Rules updated (v6)
Check the status of ufw firewall status, You’ll notice that traffic is allowed to port 8080 from anywhere.
hemant@Ubuntu-VM:~$ sudo ufw status
Status: active
To                         Action      From
--                         ------      ----
8080                       ALLOW       Anywhere
OpenSSH                    ALLOW       Anywhere
8080 (v6)                  ALLOW       Anywhere (v6)
OpenSSH (v6)               ALLOW       Anywhere (v6)
🚀 Awesome! Now that Jenkins is installed and your firewall is configured, you've completed the installation stage. It's time to access the Jenkins portal and start your CI/CD journey! 😎
My Ubuntu VM deployed on Azure 🔧 so will access Jenkins with a public IP address. Simply use the public IP to navigate to the Jenkins portal in your web browser. 🌐
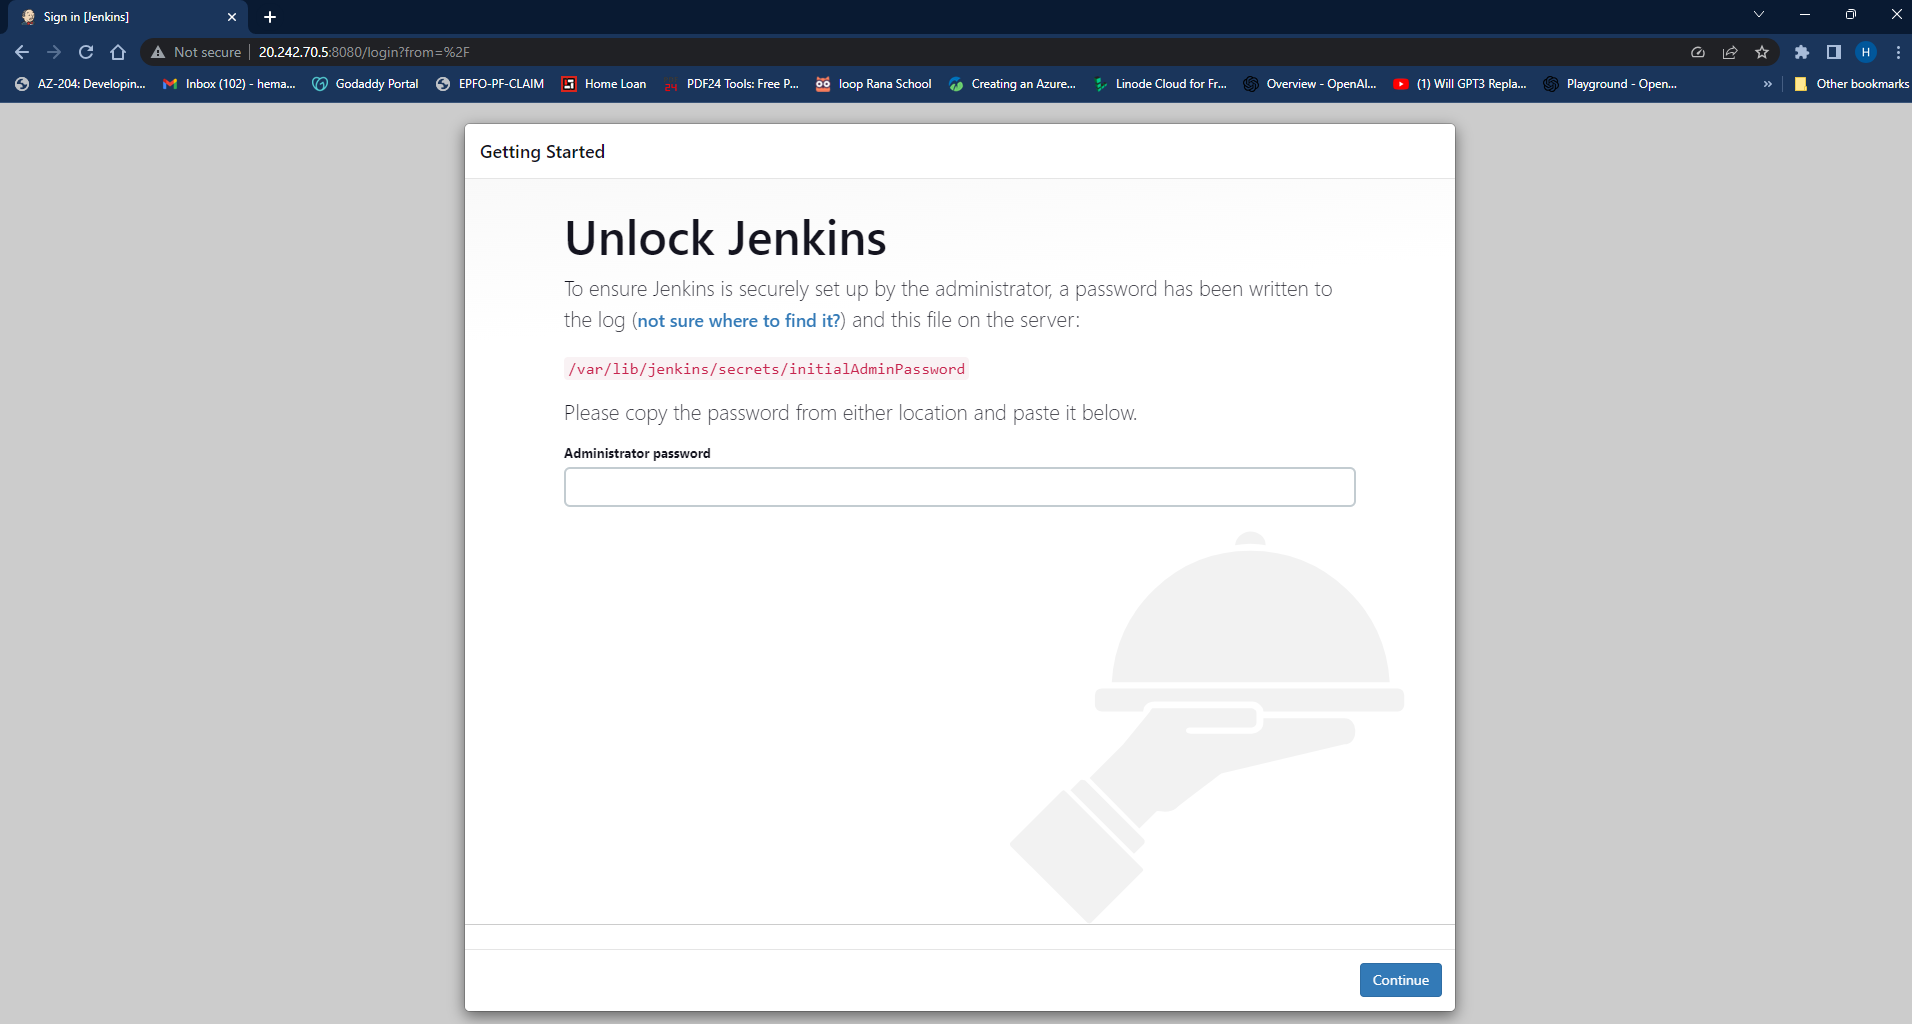
After providing initial configuration will have Jenkins Portal on the screen.
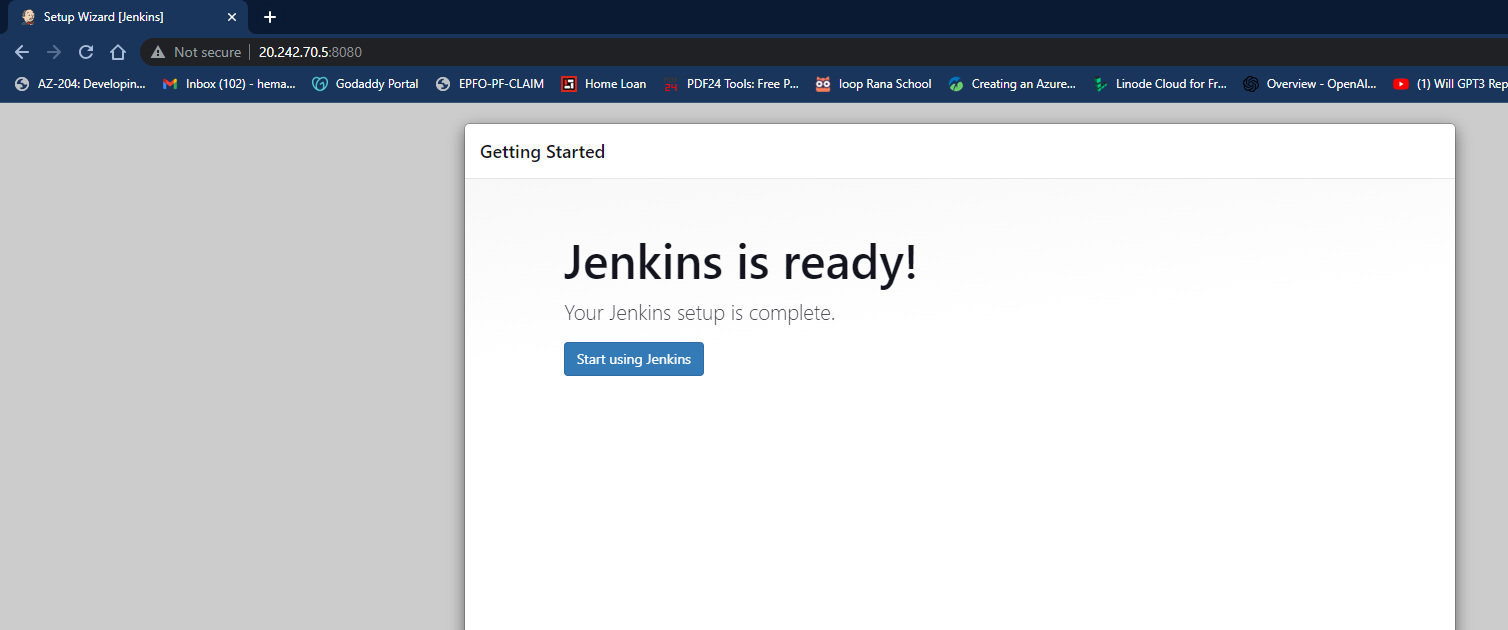
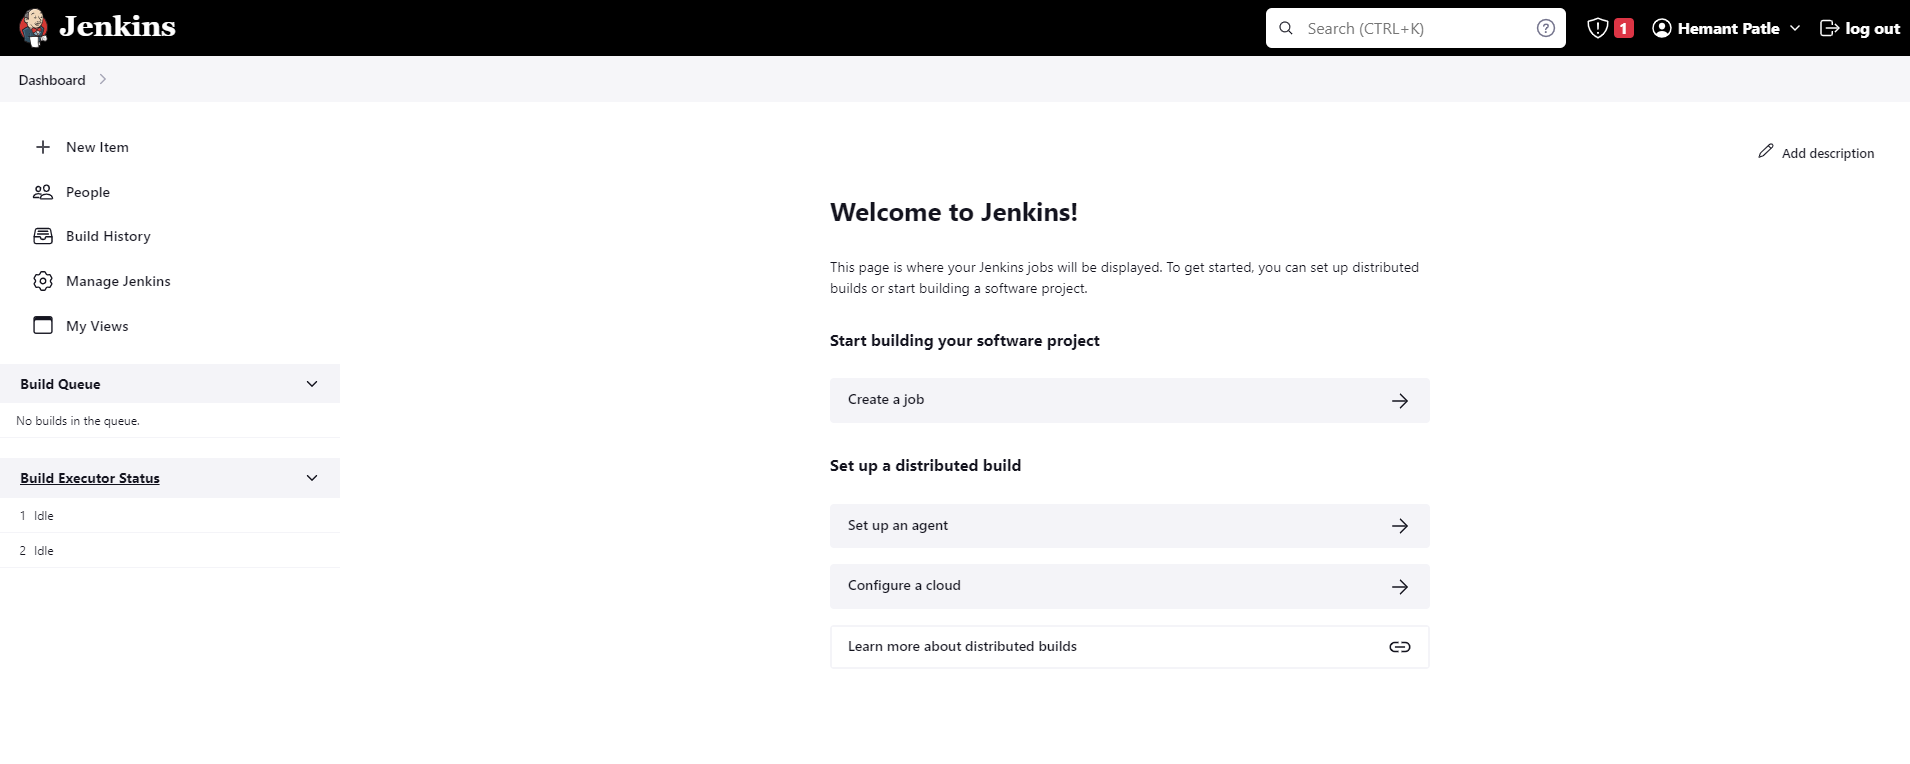
You have now successfully installed and started Jenkins on Ubuntu Linux.
Let's get your hand's on a Practical demonstration of CentOS
Install Docker and Jenkins in your CentOS Server system
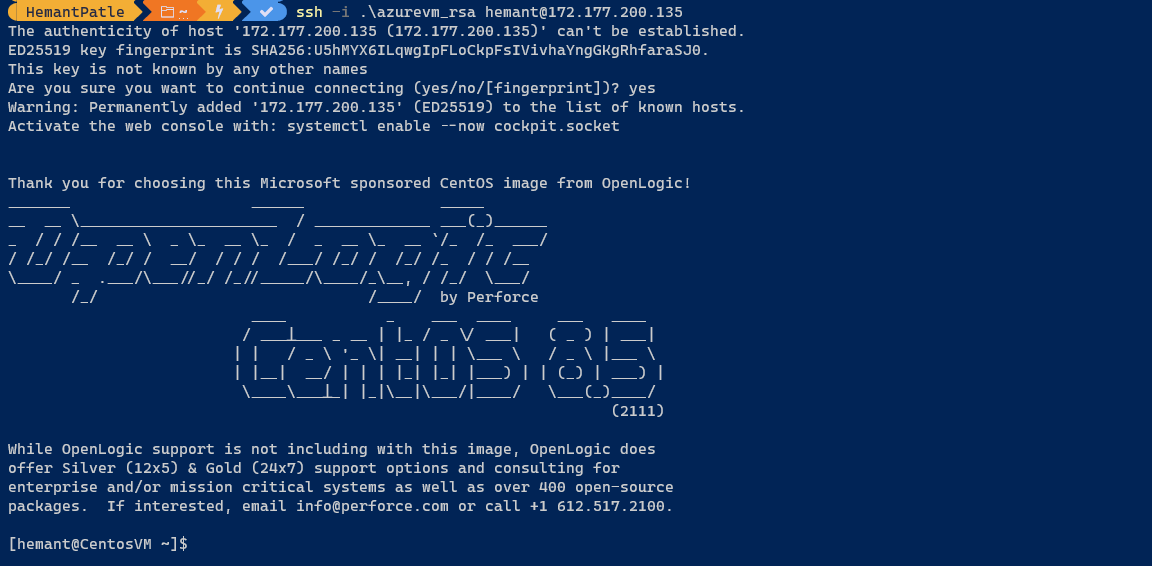
My CentOS Server is created on Azure Portal
Connecting my Azure CentOS VM through SSH
Prerequisites
- Docker Engine needs the 64-bit version of CentOS!
Let's Start with Docker Installation on CentOS.
[hemant@CentosVM ~]$ sudo yum update
In testing and development environments, you can use automated convenience scripts to install Docker.
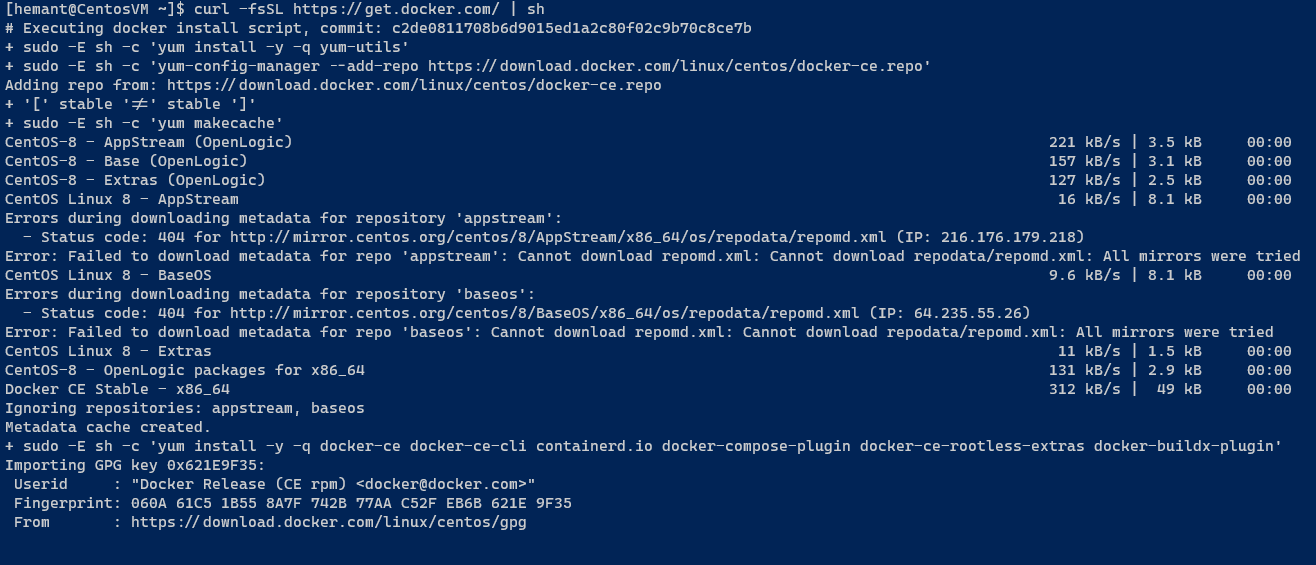
This example downloads the script from https://get.docker.com/ and runs it to install the latest stable release of Docker on Linux.
[hemant@CentosVM ~]$ curl -fsSL https://get.docker.com/ | sh
# Executing docker install script, commit: c2de0811708b6d9015ed1a2c80f02c9b70c8ce7b
+ sudo -E sh -c 'yum install -y -q yum-utils'
+ sudo -E sh -c 'yum-config-manager --add-repo https://download.docker.com/linux/centos/docker-ce.repo'
Adding repo from: https://download.docker.com/linux/centos/docker-ce.repo
+ '[' stable '!=' stable ']'
+ sudo -E sh -c 'yum makecache'
CentOS-8 - AppStream (OpenLogic)                                                                                    221 kB/s | 3.5 kB     00:00
CentOS-8 - Base (OpenLogic)                                                                                         157 kB/s | 3.1 kB     00:00
CentOS-8 - Extras (OpenLogic)                                                                                       127 kB/s | 2.5 kB     00:00
CentOS Linux 8 - AppStream                                                                                           16 kB/s | 8.1 kB     00:00
Errors during downloading metadata for repository 'appstream':
  - Status code: 404 for http://mirror.centos.org/centos/8/AppStream/x86_64/os/repodata/repomd.xml (IP: 216.176.179.218)
Error: Failed to download metadata for repo 'appstream': Cannot download repomd.xml: Cannot download repodata/repomd.xml: All mirrors were tried
CentOS Linux 8 - BaseOS                                                                                             9.6 kB/s | 8.1 kB     00:00
Errors during downloading metadata for repository 'baseos':
  - Status code: 404 for http://mirror.centos.org/centos/8/BaseOS/x86_64/os/repodata/repomd.xml (IP: 64.235.55.26)
Error: Failed to download metadata for repo 'baseos': Cannot download repomd.xml: Cannot download repodata/repomd.xml: All mirrors were tried
CentOS Linux 8 - Extras                                                                                              11 kB/s | 1.5 kB     00:00
CentOS-8 - OpenLogic packages for x86_64                                                                            131 kB/s | 2.9 kB     00:00
Docker CE Stable - x86_64                                                                                           312 kB/s |  49 kB     00:00
Ignoring repositories: appstream, baseos
Metadata cache created.
+ sudo -E sh -c 'yum install -y -q docker-ce docker-ce-cli containerd.io docker-compose-plugin docker-ce-rootless-extras docker-buildx-plugin'
Importing GPG key 0x621E9F35:
 Userid     : "Docker Release (CE rpm) <docker@docker.com>"
 Fingerprint: 060A 61C5 1B55 8A7F 742B 77AA C52F EB6B 621E 9F35
 From       : https://download.docker.com/linux/centos/gpg

Installed:
  container-selinux-2:2.167.0-1.module_el8.5.0+911+f19012f9.noarch                  containerd.io-1.6.22-3.1.el8.x86_64
  docker-buildx-plugin-0.11.2-1.el8.x86_64                                          docker-ce-3:24.0.5-1.el8.x86_64
  docker-ce-cli-1:24.0.5-1.el8.x86_64                                               docker-ce-rootless-extras-24.0.5-1.el8.x86_64
  docker-compose-plugin-2.20.2-1.el8.x86_64                                         fuse-common-3.2.1-12.el8.x86_64
  fuse-overlayfs-1.7.1-1.module_el8.5.0+890+6b136101.x86_64                         fuse3-3.2.1-12.el8.x86_64
  fuse3-libs-3.2.1-12.el8.x86_64                                                    libcgroup-0.41-19.el8.x86_64
  libslirp-4.4.0-1.module_el8.5.0+890+6b136101.x86_64                               policycoreutils-python-utils-2.9-16.el8.noarch
  slirp4netns-1.1.8-1.module_el8.5.0+890+6b136101.x86_64
[hemant@CentosVM ~]$ sudo docker run hello-world
docker: Cannot connect to the Docker daemon at unix:///var/run/docker.sock. Is the docker daemon running?.
See 'docker run --help'.
As we are getting an error and the command not executed may be due to the docker service not yet started, Let's check by using the "systemctl "command.
[hemant@CentosVM ~]$ sudo systemctl status docker
● docker.service - Docker Application Container Engine
   Loaded: loaded (/usr/lib/systemd/system/docker.service; disabled; vendor preset: disabled)
   Active: inactive (dead)
     Docs: https://docs.docker.com
As shown above output after checking the status it shows the docker engine is not in active mode, Let's start by using the "systemctl "command and then check the status.
[hemant@CentosVM ~]$ sudo systemctl start docker
[hemant@CentosVM ~]$ sudo systemctl status docker
● docker.service - Docker Application Container Engine
   Loaded: loaded (/usr/lib/systemd/system/docker.service; disabled; vendor preset: disabled)
   Active: active (running) since Wed 2023-08-02 07:58:28 UTC; 28s ago
     Docs: https://docs.docker.com
 Main PID: 36584 (dockerd)
    Tasks: 8
   Memory: 30.3M
   CGroup: /system.slice/docker.service
           └─36584 /usr/bin/dockerd -H fd:// --containerd=/run/containerd/containerd.sock

Aug 02 07:58:27 CentosVM systemd[1]: Starting Docker Application Container Engine...
Aug 02 07:58:27 CentosVM dockerd[36584]: time="2023-08-02T07:58:27.280026388Z" level=info msg="Starting up"
Aug 02 07:58:27 CentosVM dockerd[36584]: time="2023-08-02T07:58:27.365331123Z" level=info msg="Loading containers: start."
Aug 02 07:58:27 CentosVM dockerd[36584]: time="2023-08-02T07:58:27.885651187Z" level=info msg="Loading containers: done."
Aug 02 07:58:27 CentosVM dockerd[36584]: time="2023-08-02T07:58:27.914788211Z" level=info msg="Docker daemon" commit=a61e2b4 graphdriver=overlay2 v>
Aug 02 07:58:27 CentosVM dockerd[36584]: time="2023-08-02T07:58:27.914950614Z" level=info msg="Daemon has completed initialization"
Aug 02 07:58:28 CentosVM dockerd[36584]: time="2023-08-02T07:58:28.023587369Z" level=info msg="API listen on /run/docker.sock"
Aug 02 07:58:28 CentosVM systemd[1]: Started Docker Application Container Engine.
As you have seen our docker engine started now, Let's verify now and run hello-world image.
[hemant@CentosVM ~]$ sudo docker run hello-world
Unable to find image 'hello-world:latest' locally
latest: Pulling from library/hello-world
719385e32844: Pull complete
Digest: sha256:926fac19d22aa2d60f1a276b66a20eb765fbeea2db5dbdaafeb456ad8ce81598
Status: Downloaded newer image for hello-world:latest

Hello from Docker!
This message shows that your installation appears to be working correctly.

To generate this message, Docker took the following steps:
 1. The Docker client contacted the Docker daemon.
 2. The Docker daemon pulled the "hello-world" image from the Docker Hub.
    (amd64)
 3. The Docker daemon created a new container from that image which runs the
    executable that produces the output you are currently reading.
 4. The Docker daemon streamed that output to the Docker client, which sent it
    to your terminal.

To try something more ambitious, you can run an Ubuntu container with:
 $ docker run -it ubuntu bash

Share images, automate workflows, and more with a free Docker ID:
 https://hub.docker.com/

For more examples and ideas, visit:
 https://docs.docker.com/get-started/

The above command downloads a test image and runs it in a container. When the container runs, it prints a confirmation message and exits.
You have now successfully installed and started Docker Engine.
Installing Jenkins on CentOs Server
We all know now why we used Jenkins and will start installation on CentOs 8 Server now.
Prerequisites
A Linux system with CentOS 8 Installed
Java version 8
Let's Start with Jenkins Installation on CentOs 8.
Jenkins requires Java to run, so let's install the JDK. Run the following command:
sudo yum -y install java-11-openjdk-devel
[hemant@CentosVM ~]$ java -version
openjdk version "11.0.13" 2021-10-19 LTS
OpenJDK Runtime Environment 18.9 (build 11.0.13+8-LTS)
OpenJDK 64-Bit Server VM 18.9 (build 11.0.13+8-LTS, mixed mode, sharing)
Importing the repository key from Jenkins
[hemant@CentosVM ~]$ sudo wget -O /etc/yum.repos.d/jenkins.repo \
>     https://pkg.jenkins.io/redhat-stable/jenkins.repo
Importing the key, add the repository to the system
sudo rpm --import https://pkg.jenkins.io/redhat-stable/jenkins.io-2023.key
[hemant@CentosVM ~]$ sudo yum upgrade
[hemant@CentosVM ~]$ sudo yum install jenkins
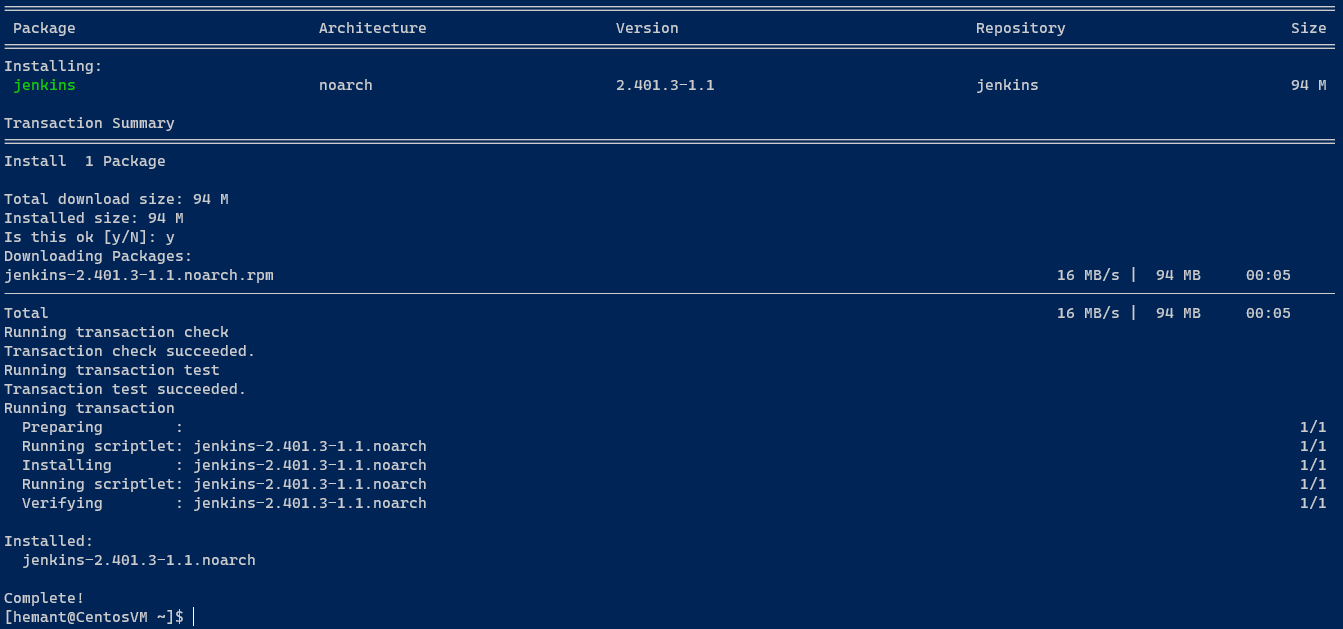
Jenkins installation is complete by default, Jenkins runs on port 8080.
check first whether Jenkins service is active or not and port is open or not.
[hemant@CentosVM ~]$ sudo systemctl status jenkins
● jenkins.service - Jenkins Continuous Integration Server
   Loaded: loaded (/usr/lib/systemd/system/jenkins.service; disabled; vendor preset: disabled)
   Active: inactive (dead)
As the above-shown command output service is not active, let's start the service first and then check the status.
[hemant@CentosVM ~]$ sudo systemctl start jenkins
[hemant@CentosVM ~]$ sudo systemctl start jenkins
[hemant@CentosVM ~]$ sudo systemctl status jenkins
● jenkins.service - Jenkins Continuous Integration Server
   Loaded: loaded (/usr/lib/systemd/system/jenkins.service; disabled; vendor preset: disabled)
   Active: active (running) since Wed 2023-08-02 08:49:05 UTC; 53s ago
 Main PID: 41686 (java)
    Tasks: 49 (limit: 23678)
   Memory: 1.1G
   CGroup: /system.slice/jenkins.service
           └─41686 /usr/bin/java -Djava.awt.headless=true -jar /usr/share/java/jenkins.war --webroot=/var/cache/jenkins/war --httpPort=8080

Aug 02 08:48:51 CentosVM jenkins[41686]: Jenkins initial setup is required. An admin user has been created and a password generated.
Aug 02 08:48:51 CentosVM jenkins[41686]: Please use the following password to proceed to installation:
Aug 02 08:48:51 CentosVM jenkins[41686]: 01dbc3c3e62a4f8388c841e348c003ab
Aug 02 08:48:51 CentosVM jenkins[41686]: This may also be found at: /var/lib/jenkins/secrets/initialAdminPassword
Aug 02 08:48:51 CentosVM jenkins[41686]: *************************************************************
Aug 02 08:49:05 CentosVM jenkins[41686]: 2023-08-02 08:49:05.910+0000 [id=29]        INFO        jenkins.InitReactorRunner$1#onAttained: Completed >
Aug 02 08:49:05 CentosVM jenkins[41686]: 2023-08-02 08:49:05.978+0000 [id=22]        INFO        hudson.lifecycle.Lifecycle#onReady: Jenkins is ful>
Aug 02 08:49:05 CentosVM systemd[1]: Started Jenkins Continuous Integration Server.
Aug 02 08:49:06 CentosVM jenkins[41686]: 2023-08-02 08:49:06.169+0000 [id=46]        INFO        h.m.DownloadService$Downloadable#load: Obtained th>
Aug 02 08:49:06 CentosVM jenkins[41686]: 2023-08-02 08:49:06.170+0000 [id=46]        INFO        hudson.util.Retrier#start: Performed the action ch>
Allow port 8080/tcp on the firewall all required commands are given below.
[hemant@CentosVM ~]$ sudo firewall-cmd --add-port=8080/tcp --permanent
success
[hemant@CentosVM ~]$ sudo firewall-cmd --reload
success
[hemant@CentosVM ~]$ sudo firewall-cmd --list-all
public (active)
  target: default
  icmp-block-inversion: no
  interfaces: eth0
  sources:
  services: cockpit dhcpv6-client ssh
  ports: 8080/tcp  ------------------------->>> 8080 port now allow in firewall
  protocols:
  forward: no
  masquerade: no
  forward-ports:
  source-ports:
  icmp-blocks:
  rich rules:
[hemant@CentosVM ~]$
Also, whitelist 8080 on your cloud whichever you used, for me I have whitelisted on the Azure portal.
🚀 Awesome! Now that Jenkins is installed and your firewall is configured, you've completed the installation stage. It's time to access the Jenkins portal and start your CI/CD journey! 😎
My CentOs Server 8 VM deployed on Azure 🔧 so will access Jenkins with a public IP address. Simply use the public IP to navigate to the Jenkins portal in your web browser. 🌐
http://<Public Ip>:8080
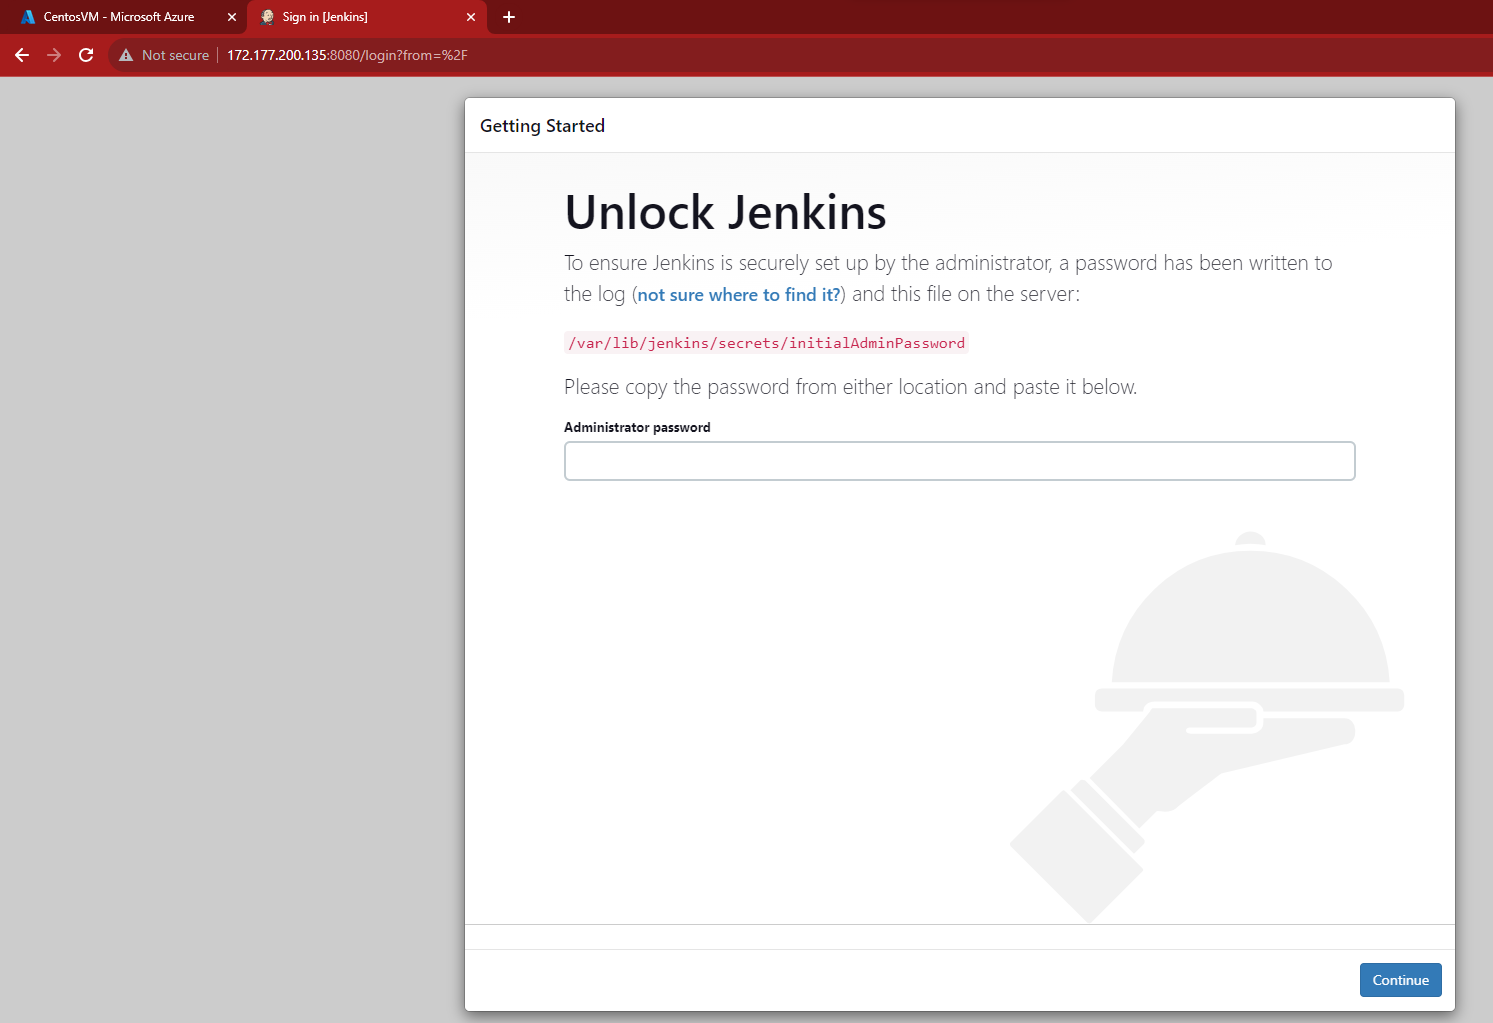
After providing the initial configuration will have Jenkins Portal on the screen.
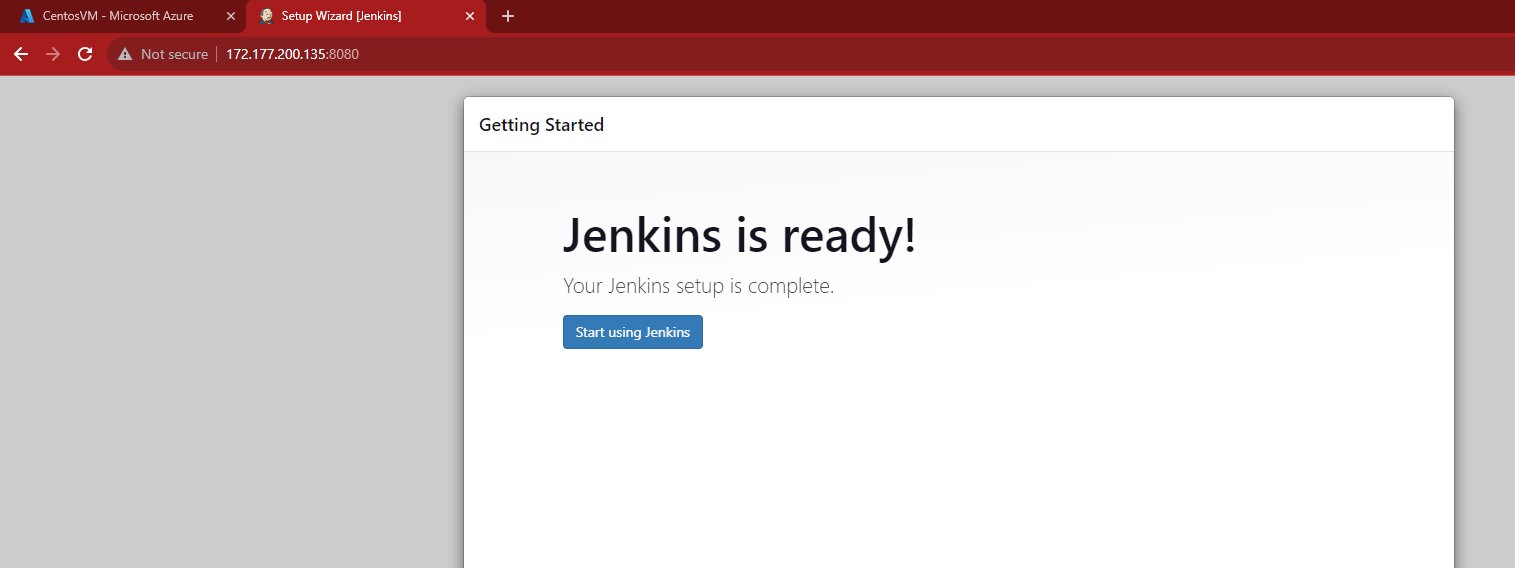
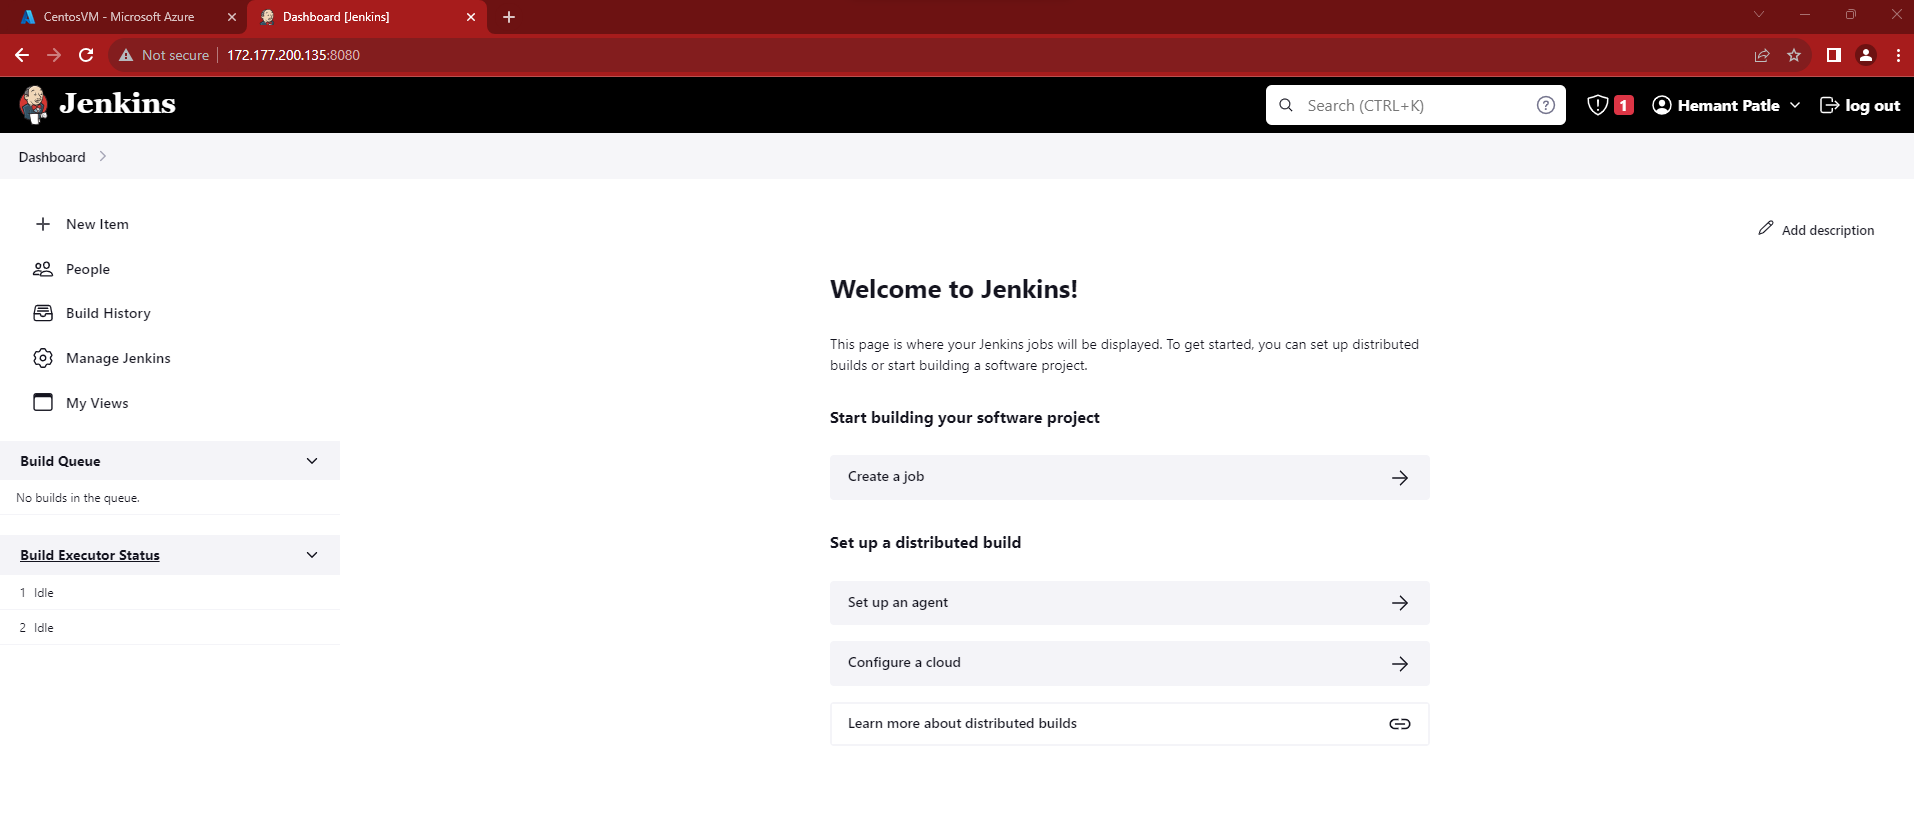
You have now successfully installed and started Jenkins on CentOs server Linux.
Conclusion
In this interactive blog post, we explored the concepts of package managers and systemctl on Ubuntu and CentOs 8 Server. We installed Docker, a powerful containerization platform, and Jenkins, a versatile automation server, to enhance our development and deployment workflows.
Package managers like apt and yum makes software installation on Linux systems a breeze, while systemctl enables us to manage and control system services.
Mastering these tools will undoubtedly empower you to efficiently manage your Ubuntu Server and streamline your software deployment processes. Happy coding!
Thank You !!
Comments
Join the discussionNo comments yet. Be the first to comment.


